Climbing Kilimanjaro: The Ultimate Kilimanjaro Packing List
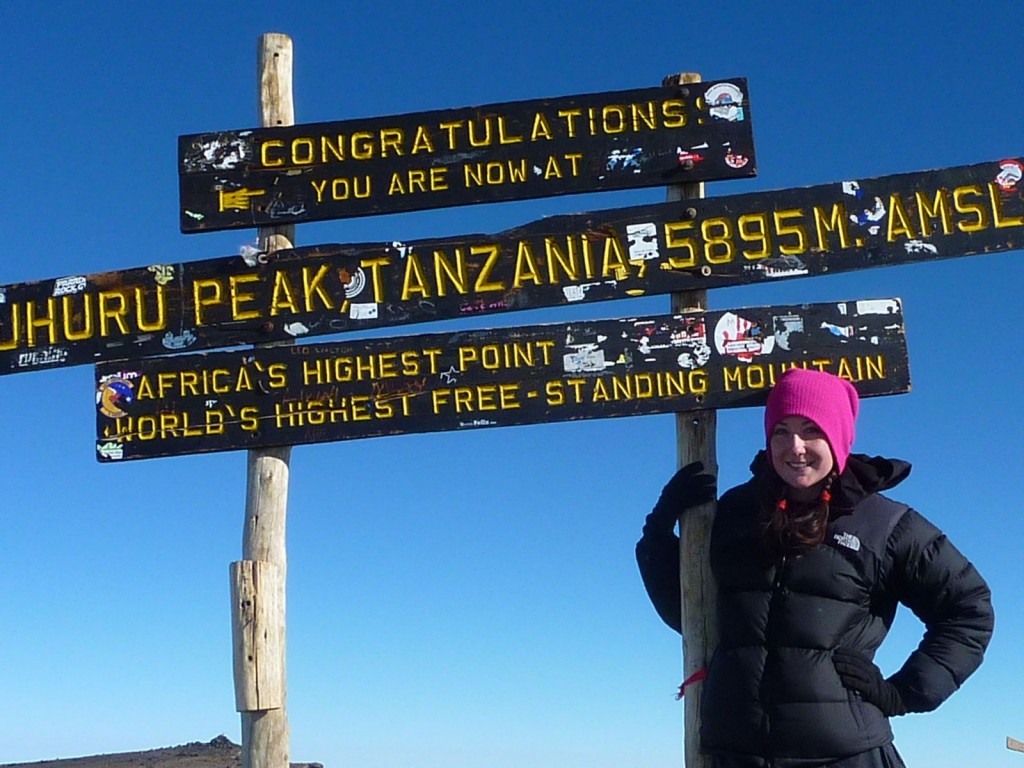
Climbing to the top of Mount Kilimanjaro, Tanzania, which has an altitude of 5,895 m (19,341 ft) above sea level, was probably the most challenging thing I’ve ever done in my life.
But having the right kit can really make a difference both physically and mentally, so here’s my perfect Kilimanjaro packing list!
Baggage
- Backpack/Holdall:Â I took a 70l Mountain Equipment Wet and Dry Bag. This has a zipped pouch where you can place any wet items. I’d recommend taking 70l ”“ 90l size.
- Daypack
:Â You need a good size Kilimanjaro day pack to fit in all the items you will need each day, as your bigger pack won’t stay with you. I use a Osprey Atmos 35
backpack with an air flow mesh back panel compartment. This gives me a handy place to keep my Camelbak water bottle and also keeps the bag off my back so I don’t get sweaty (and then cold).
- Packing Cubes:Â These are one of my favourite travel items. I use the Eagle Creek
Pack-It Cubes. They are really handy for keeping the stuff in my backpack separate, tidy and easy to find. I also wrap mine in a fleece and use it as a pillow!
- Wallet:Â I carry 2 wallets when I’m travelling in Africa. A small one that I have on me at all times with a small amount of cash. The second is a bigger wallet that I keep the bulk of my cash, travel documents, passport etc. Keep these in your day pack and with you at all times.
- Waterproof Covers:Â To keep your bags dry! Wet clothes are not fun. A lot of bags come with these already built in so consider than when you buy.Â
Sleeping
I struggled sleeping with the altitude and the cold, so do whatever you can to make sure you sleep well on the mountain.
- Sleeping Bag: You don’t need to spend a fortune, but you do need a great sleeping bag. For extreme cold weather I currently use a Rab Women’s Ascent 700
 - it’s a lightweight, 4 season down sleeping bag. A cheaper alternative is to get a synthetic sleeping bag like a Challenger Lite 400
, the only downside is that they tend to be bigger and heavier.
- Sleeping Bag Liner: I used a silk Lifeventure
 liner. It helps keep your sleeping bag clean and adds that extra bit of warmth. I also used this on its own in hotter climates like the Tanzanian coast and in Southeast Asia. If you’re just doing Kilimanjaro, a fleece liner
 would be a cheaper alternative.
- Roll Mat
: Therm-a-Rest
 is my brand of choice, and they have a really wide selection now. Some companies provide you with a roll mat, so check before you go.
Clothing
The clothes you take to Kilimanjaro are VERY important. The last thing I wanted to do was fail because I was too cold! The basic principle is layers of warm, quick drying and breathable clothing. Avoid anything heavy like jeans! Icebreaker and North Face are my favourite brands, but there are plenty of other good makes too!
- Insulated Jacket: To be used on summit night and sitting around at the campsites. I have a North Face Nuptse
 jacket, which I still wear now.
- Light Fleece:Â Great for use in the day when it’s not too cold. I have The North Face Women’s 100 Glacier
 which I wear all the time.
- Warm Fleece: To put over my lighter fleece when I needed it. Comfy and they dry super quick. I had The North Face Women’s 200 Shadow
 but I stupidly left it on a bus in Bagkok! You could get away with just one fleece. I’d take the warmer one if you do this.
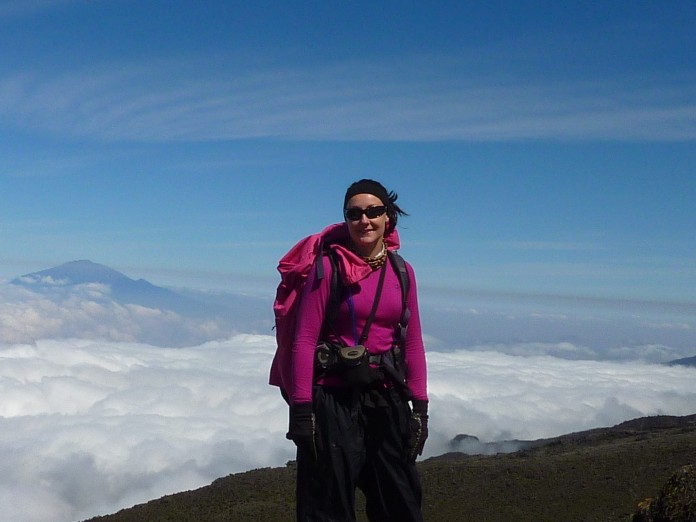
- Waterproof Jacket: Breathable and lightweight waterproofs are best. Your jacket should be big enough to go over your other layers and kept in your daypack. I have a bright pink North Face Resolve Jacket
. I was lucky, we had no rain, but getting wet on Kili would not be nice.
- Waterproof trousers: I hired these as they were something I’d not wear again.
- Light Weight Trousers: I took two pairs, both North Face -Â a pair of zip-off trekking trousers
 and a pair of fleece pants
which were really comfortable for walking in and warm in the evening. You could just take one pair if you were short on space.
- Thermal Leggings: These are really good to take because you can walk in them, they’re really comfortable to sleep in and provide extra insulation on summit night. I have a pair from North Face.
- 2 x T-shirts/Vest Tops:Â A t-shirt
 with wicking properties is best. These tops draw the sweat away from your body so that you don’t get cold.
- Thermal Long Sleeved Top: My favourite brand is Icebreaker . I took two of them (but one would be ok), one slightly thicker than the other. They’re made from Merino wool and they’re cool enough to walk in but also keep you warm when you need it. They don’t itch and don’t smell sweaty, even after 6 days of trekking! I lived in mine!
- Pants/Knickers: Normal, comfortable ones are fine!
- Sports Bra: Sports bras are perfect as they take the sweat away from the body.
- 3 x Walking Socks: ”“ I took 3 pairs of walking socks, with different thicknesses. I used a really thick pair for the summit.
- Liner Socks: Wear these inside your walking socks to help prevent blisters. Take a pair for every day, clean socks are nice!
- Warm Hat: Beanie type with a fleece lining is my favourite.
- Wide Brimmed Hat:Â Good for protecting your face and neck from the sun. I didn’t take one and didn’t miss it, but a lot of people did have them.
- Buff:Â I have a leopard print Buff
. They’re good for keeping your head and neck protected from the sun, keeping your hair out of the way or keeping warm.
- Balaclava: ”“ Only really needed on summit night to keep your face protected from the cold wind.
- Gaiters ”“ Good for the wet season. I didn’t need these. Hire them if you don’t have them already.
- Other Clothes: For the days before and after the climb. A lot of guest houses will let you leave these there, so take an extra bag to store any non- Kili clothes.
- Polarized Sunglasses:Â To stop the dangerous reflections from the snow which can hurt your eyes.
- Liner Gloves: Fleece are good.
- Thick Gloves: I took Marmot mittens
to keep me nice and warm on the walk to the summit.
Shoes
I can’t stress enough that you should wear your boots as much as you can before you go! Blisters are really not not fun, and once you have them, you’re stuck with them and they will plague you every step of the way – I know this from experience.
- Walking Boots: They should have good ankle and arch support. Get waterproof ones, or get them waterproofed. Try them out in the shop, and make sure there is good room for your toes. The worst damage to your feet is often done on the way down (many people lose toenails). So stand on a downward slope if you can when testing them out. Are they super comfy?
- Trainers: Good for the evenings to give your feet a rest from your heavy boots. Your usual running shoes are fine.
Toiletries/Hygiene
You won’t have much in the way of bathroom facilities so just the basics are needed.
- Toiletries Bag:Â I take a simple canvas wash bag.
- Toilet Paper:Â I like to take a couple of rolls, just in case. To save space, remove the cardboard in the middle (don’t forget to recycle).
- Toothbrush & Toothpaste: Use bottled or treated water to brush with.
- Soap:Â Keep a small soap in a small plastic soap container to wash with.
- Facial Moisturiser: I have used Olay Essentials Complete Care Daily UV Lotion Sensitive SPF 15
 for years.
- Wet Wipes: It’s not easy to wash on Kili so wet wipes are a great way of freshening up (and good for cleaning your tent if you’re sick everywhere like I was).
- Deodorant: Small roll-on.
- Lip Balm:Â One with SPF is probably best but I just use Vaseline (this is also good to put on your feet to stop blisters) or Nivea Lip Butter.
- Hair Ties: You won’t be able to wash your hair on the mountain so these are a must. I just kelpt my hair tied up most of the time and tried not to touch it.
- Tampons: Being a woman sucks sometimes.
- Suntan Lotion:Â At least SPF 30. I always use Clinique City Block SPF 40 on my face.
You also want to consider:
- Toothbrush Guard: Keeps your toothbrush clean. Available at most drugstores or chemists.
- Small Mirror:Â Get one that’s not easily breakable.
- Nail Brush: No matter how hard you try, your nails will be dirty. This helps a bit!
- Hair Brush:Â Just pack the littlest one you can get away with.
- Sanitary Disposal Bags: Don’t throw anything away on the mountain.
Health
- First Aid Kit: I carry a small but comprehensive kit with my own needles, scissors, tweezers etc. I use Lifesystems World Traveller First Aid Kit.
- Medications: Painkillers (ibruprofen/paracetamol), Pepto Bismol, loperimide (diarrhoea tablets) and any other medication you need.
- Acetazolamide Tablets (Diamox): ”“ This is a personal choice and it’s up to you if you use this to help with the altitude. You’ll need to get these from your doctor. My main piece of advice would be to test the medication at home before you go up the mountain. I think the tablets made me feel worse so I stopped taking them halfway up. Test BEFORE you start your climb, once it’s in your system, that’s it!
- Re-hydration Sachets: These are a godsend! Dioralyte
are the best I’ve tasted.
- Hand Sanitizer:Â Last thing you want on the mountain is a dodgy tummy, so do all you can to keep your hands germ free.
- Antiseptic Cream: Any will do.
- Blister Plasters: Scholl do a great range. Wear even before you get blisters anywhere you think your boots might rub.
- Malaria Tablets:Â There are few mosquitoes on the mountain, especially after day 1 but you could still be susceptible to malaria in the days prior to and after your climb. Some anti-malarial tablets can’t be used at altitude (Lariam) so check with your doctor before you go. I used Malarone.
- Mosquito Repellent:Â Choose one like Jungle Formula
 which contains 50% or more Deet. You’ll only need a small bottle as mosquitos aren’t really an issue after the first day. I used it more before and after the climb than during.
- Birth Control Pills: It’s much more convenient NOT to have to deal with your period as well as everything else but this is a personal choice. Just remember that anti-malarials stop the pill from working!
Electrical Equipment
- Head Torch
:Â Essential item. I use a PATHFINDER 21 LED Headlamp
. You’ll want to have a good head torch as there is no lighting up on the mountain.
- Camera & Case:Â My camera at the time was a point and shoot Panasonic Lumix
, however cameras move on so quickly. I now use an Olympus OMD-10, but I haven’t tried it at sub-zero temperatures. They didn’t exist back then, but now I would take a GoPro for sure! But whatever camera you take, just make sure you keep it in an inside pocket on summit night – you do not want it to get too cold, stop working and not be able to capture your moment of glory. Also make sure you save some battery for the summit.
- Adapters:Â In Tanzania (and Kenya if that’s where you’re flying into) they use British style plugs most of the time.
- MP3 Player: I love my iPod Nano
 and it’s travelled with me all around the world. Make sure it’s filled with motivational tunes.
- Kindle: There’s a lot of downtime on the mountain, especially if you climb alone like me, so having a Kindle to read would have been great!
- Solar Charger: I didn’t have one and really regretted it. I’ve since bought a Powertraveller Solar Portable Charger
 which I love.
- Spare Batteries: For your head torch.
- Mobile Phone: ”“ You can easily buy sim cards with data in Moshi or Arusha and there’s usually signal on the mountain. Great for keeping worried parents and relatives informed of your progress. I usually just take an old one in case it breaks.
Paperwork
- Passport:Â Make sure it’s valid for 6 months after you return from Tanzania.
- Travel Tickets: Airline, any travel vouchers etc.
- Insurance Documents: I recommend World Nomads.
- Visa: You can get single entry visas at the airport and you will need dollars to pay for it. Double entry visas can be obtained from your local Tanzanian embassy.
- Copies: Of all of the above ”“ keep separate from the originals. Leave a copy at home too.
- 2 x Passport Photos: I always carry these, just in case.
- Yellow Fever Certificate: Required for entry.
Money
You will need a mixture of money. Whilst travellers cheques are safer, they are hard to exchange and you can be charged a higher rate so I wouldn’t recommend taking them (but that’s just me). I take a mix of dollars, GBP and my cards. You cannot get Tanzanian shillings outside Africa (well in the UK anyway), so you will need to exchange when you get there. There are exchange facilities and ATMs at the airports and in Moshi/Arusha towns.
- Dollars: Good for paying for visas, tipping your Guides/Porters/Cooks and park fees (if not included in your trek fee already). Higher denominations are best as you’ll get better exchange rates.
- Your Own Currency:Â For changing into Tanzanian shillings. Whether this be Euros, GBP or Dollars ”“ saves you getting stung on the exchange rate twice.
- Visa Card:Â Whilst Visa is widely accepted, Mastercard is not, so please take a Visa card and let your bank know where you will be going so they don’t block your cards.
- Money Belt:Â Instead of the usual round the waist money belt, I have a pouch that links onto my belt and slips down my trousers. Great way of carrying money about.
Keep your money with you at all times. You shouldn’t need to use much money with you on the moutain, so your could store the majority of your cash in a safe place. The only money I needed was tipping the crew at the end, and a few cans of Coke from the shop en route. Although at $5 a pop, they’re not cheap! But I couldn’t eat and had no energy bars, so it was that or nothing. I think you can also pay to use some slightly nicer toilets, but I didn’t do that.
Miscellaneous
- Water Bottle:Â I have two a Camelbak Bottle
 and a Camelbak Hydration Pouch
. The pouch I have was great, but they don’t make it anymore but this one is a very similar. The hydration pouches are great as they have a tube that you can drink from so no having to stop and get your flask out! These are a Godsend on summit night. I would recommend getting a thermal tube
 for it so that your water doesn’t freeze.
- Walking Poles:Â I just hired these in Moshi. Really help your knees!
- Ear Plugs/Blindfold: To help you get to sleep early on summit night.
- Energy Bars: ”“ Chocolate, Lucozade tablets, cereal bars, nuts, Kendal Mint Cake etc (whatever you can fit in).
- Towel: There’s not much opportunity to wash, so a small, quick drying microfibre one should do the trick.
- Notebook & Pen:Â To capture all those thoughts and amazing moments.
- Duct/Electrical Tape:Â Always useful to repair ripped or broken items.
- Plastic Bags:Â To separate things in your bag.
- Heat Pouches: I didn’t use these, but they are good to put inside your gloves on summit night.
- Blizzard Survival Bag: For emergencies only so hopefully you wouldn’t have to use this!
- Envelopes: For tipping (for how much to tip, check out this post).
If you have any questions or concerns, please give me a shout in the comments below or send me an email. I talk people through this trip all the time and happy to do so!
If you’re interested to read about my Kilimanjaro trip or my more recent trip back to Kenya and Tanzania, check these out:
Part 1: Climbing Mount Kilimanjaro – The Journey Begins
Part 2: Conquering Kili – The Roof of Africa
My Africa Travel Budget: 5 Weeks in Kenya and Tanzania
Have you climbed Kilimanjaro? How was it?Â
Some of the links in this post are affiliate links, which will earn me a small commission at no extra cost to you. Be assured that I only recommend products I actually use myself, but if you have any questions, please get in touch via email, or in the comments below. Affiliate sales help with the running costs of this site so thank you for your support!

Loving reading you’re adventures Helen xx
Thanks Toni!
Wow that’s an awful lot of money to spend on tips, why is it customary to tip so much?
Hi Stephanie,
I’m not sure why it’s customary to be honest, these are just the typical amounts from the travel companies. I probably could have paid a bit less to be fair and it is a lot, but I guess it’s due to the low wages they receive and when you break it down per day, it doesn’t seem so much. They carry so much stuff for you up the mountain, literally back breaking work – although these guys are strong! I know some guides pretty much carry people up. I didn’t need that, I was just really sick, but somehow strong. Essentially, it’s a pretty dangerous job that they do. The altitude, the cold etc…
Even though at the time, it was a lot, especially as I was on an extended trip and didn’t have loads of money, after all that they helped me with, I was happy to pay it! But it’s definitely something to factor in!
Helen x
Great list, Helen! I like your packing tips a lot – very thoughtful of you. Yes, I find Icebreakers a great choice as well, for thermals. And the suggestion to borrow from friends is great. There are many things to pack and you can save a lot that way. Thanks for sharing! 🙂
Thanks Mzuri! Glad you liked them! 🙂
Wow very interesting article, quite fun to read tho. Also very insightful for someone considering doing this. But i was just wondering what round about was the total cost ?
Thanks Joshua!
Hmm, with flights, climb, permits, insurance, tips, equipment – probably cost me around £2,000. Ways to save money – borrow/hire equipment, book through a company when you get there (make sure it’s a good one though ho treats the staff well).
Hey Helen.
I loved you article and makes me a lot more ready for my trip up the mountain:) I am going there with my boyfriend next week and i am soooo excited. You say that it is important to buy the trip through a company that treats the staff well but how i am able to know which company to go to? I want to book the trip when we get there to save money. Do you think the good companys still have space for us when we do not book in advance?
Hi Nadja, You can check companies on Kilimanjaro Porters Assistance Project http://www.kiliporters.org/. Yes, companies should still have space. You can ask around once you get there for recommendations!
Hi Helen, your articles are the most comprehensive I’ve read to date. My husband and I are starting our research. How far in advance would you recommend booking? Thank you!
There is some great advice here- thanks!
Thanks!
Hello Helen.
I’ve been reading your Africa posts, but now I am leaving this comment 🙂
It has been great help to me, and now I am going to go Africa for 7 weeks(Tanzania, Zambia, Kenya), thanks to you.
I am already afraid of making this long journey, but I hope everything would be great.
I am also thinking of hiking Mt. Kili, but packing for this hiking makes me a little worried, since there are other
extra stuffs to take apart from a just travel(like, sleeping bag, really warm jacket, waterproof trousers stuff etc.)
Do you think I can borrow those stuff from somewhere else near the mount?
Maybe I can prepare a beanie, or a pair of glove, or at most, a waterproof trouser, but in terms of a warm jacket,
I am thinking of one or two Uniqlo one because it can be put in a small pouch so that I can save many space and weight.
Do you think that would not be enough? And especially, a sleeping bag, can I borrow it near there?
What kind of stuff I can borrow from there?
Thank you for your post, It has been a great help for my plan!
Hi Ky, Don’t be worried, you’ll have a great time! You can hire pretty much everything when you are there! 🙂
Thank you. That is such a relief. I will leave another comment when I finish my itinerary.
Wish me luck! and Have a lovely day:)
I never used to have this on my bucket list and after we did the Inca Trail this summer I think Kilimanjaro has to be next! Thanks for the packing list!